Published
Mar. 31,
2017
The Final Touch: Postproduction of UW Images (Part 6b: Advanced Retouche)
While Adobe Camera Raw (ACR) and Lightroom provide basic tools for getting rid of a few backscatters and other smaller distracting elements in our underwater images, sometimes there are cases that require finer and more precise tools. Such tools are found in Adobe Photoshop.
A few notes before we get started:
- A photograph that "requires" more than 10 minutes of post production/editing is a photograph we should try to take again - and better - during our next dive.
- There are automated functions and ready-made "actions" for Photoshop that make promises to "automate" specific steps of editing, such as backscatter removal. The problem here is that all these functions are working with blur filters that although might wipe out backscatter, they certainly will wipe out lots of image details as well. Therefore, I always recommend doing it manually, to keep as much of original image details as possible.
Now, let's begin!
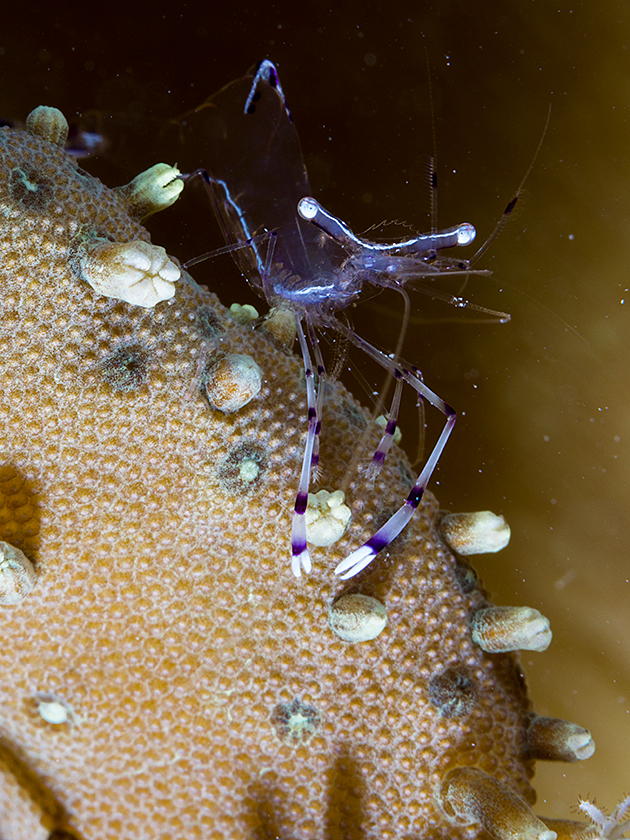
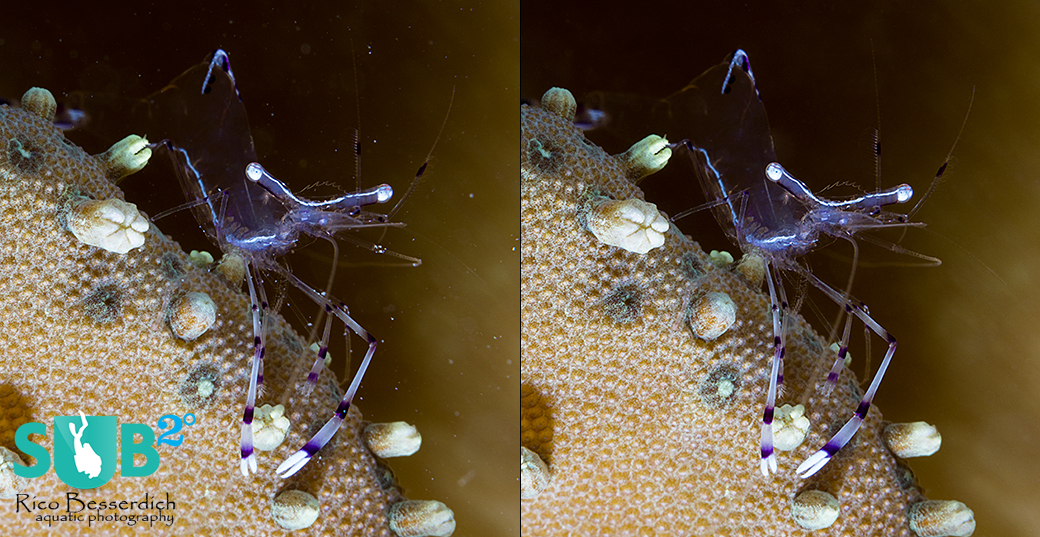
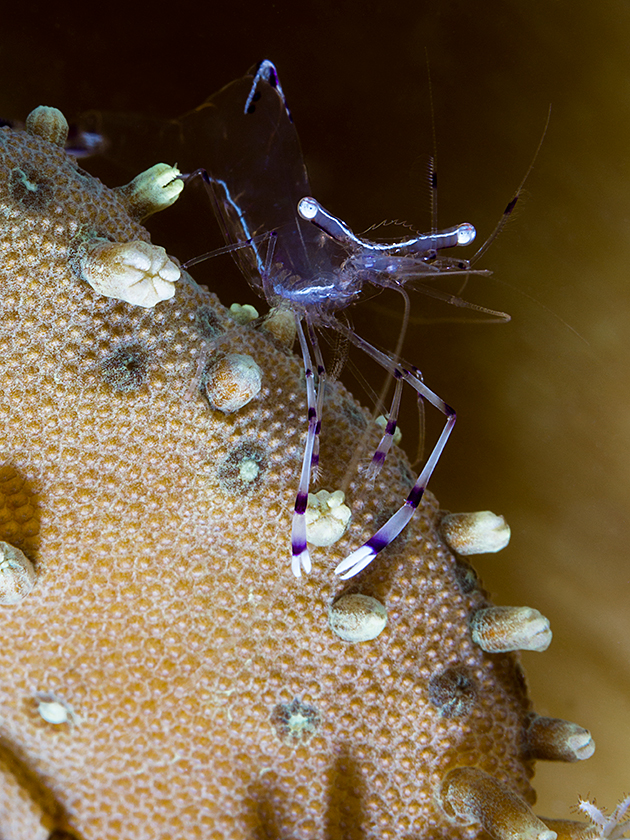
As we can see on a first view: a couple of backscatters distract the image. But there are a few other issues as well, a few little flares, probably caused by dirt or small air bubbles on the macro port's frontglass.
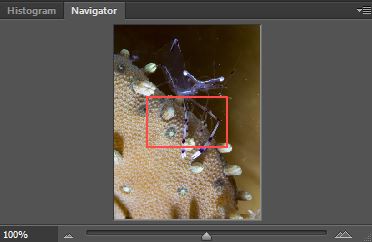
To view those little troublemakers, we need to zoom into 100% magnification.
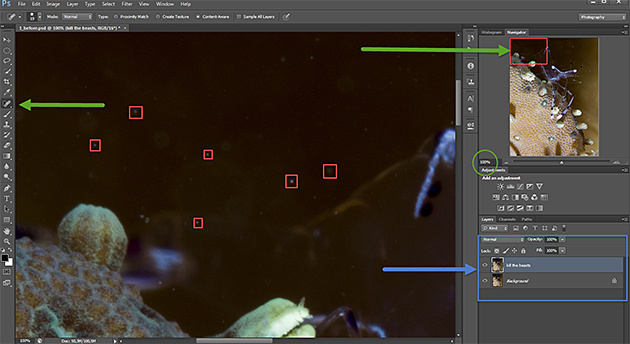
I usually use Photoshop's "Navigator" screen (at the top right) for it. The red rectangle marks the visible area and you can drag it around with your mouse, carefully observing all areas of the image in 100% magnification. The moment of truth ;-)
Having done that, I grabbed a few areas of the image, marking different issues with different colors:
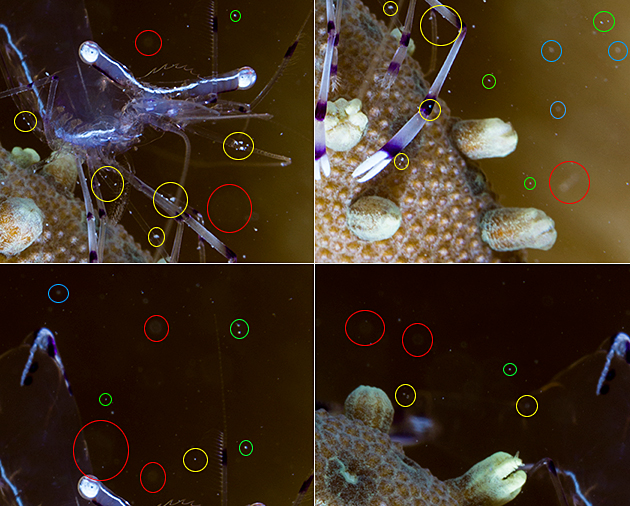
Green: Very small dots in a neutral area; easy to remove with the "Spot Removal Tool".
Blue: Larger backscatters; usually a case for the "Healing Brush Tool".
Red: Larger flares or dirt, mostly in neutral areas. Here, lots can be fixed with Photoshop's new "Patch Tool".
Yellow: Backscatters or other small distracting elements that are on the main subject (the shrimp) itself or very near to it. Mostly, the Healing Brush Tool works well here.
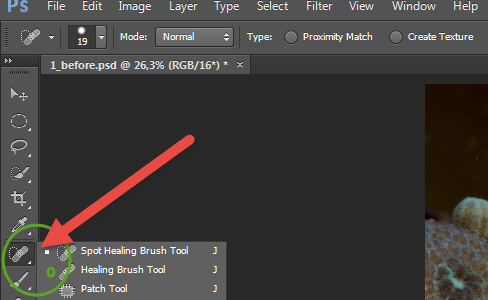
Photoshop comes with several cool tools that help us fix these types of problems. The classics, and actually the tools of choice in 99% of all cases, are the Spot Removal Tool, the Healing Brush Tool, and the Patch Tool.
You can access them with the 7th icon in Photoshop's tool bar (left side).
A classic "start position" for working with those tools would be to have a 100% magnification of your image, a copy of your background layer and the Navigator window (top right) activated. Always work in 100% magnification and move the red rectangle on the Navigator screen to edit each visible area step by step. Here is our start screen:
The functions of the tools -
1st: Spot Removal Tool
Removes spots by sampling surrounding areas. Once you clicked on a small spot you want to remove, check that the tool size is just slightly larger than the spot using the right mouse-click menu. Then the tool basically determines a "problem" zone and looks around for a "healthy" zone nearby for sampling.
It works well for for removing small dots/backscatters in neutral areas but only if a "healthy area" with similar color information is nearby. You can't select from where this tool takes the sample. But in this example it works well with my green marked areas.
2nd: Healing Brush Tool
Same concept but with one big difference: you can chose the "healthy" area to sample from yourself by holding the "ALT" key on your keyboard, clicking on an area in which to take the "correct" information from and then click on the area you want to fix.
This one works well for areas with lots of different color information/differences such as the yellow and blue marked trouble zones.
3rd: Patch Tool
You can select a larger "problem zone" in your image, then just move the selection to a "healthy" zone and Photoshop does the rest (don't forget to hit "de-select" after the fix). It works very well, however there are larger zones to fix (e.g. an area of your images with lots of larger backscatters or flares in it) that require the existence of larger "healthy" zones, in a similar color area, of course. Otherwise, you would just resample your own mistakes ;-)
The patch tool works well for larger "troublemakers" such as dirt (on the port) or flares. See the red marked areas in the tutorial picture.
This is why I recommend starting from "small" to "big". First, the smallest backscatter dots (green), then the mid-sized ones- those that are on or near the subject (blue & yellow)- and lastly, the big nasty ones (red).
Now the clock is ticking, and I will begin fixing those issues using the tools mentioned above, applying them to my "trouble zones" accordingly.
The process only took 7 min 30 sec, and my image is now fixed :-) So, following my own "rules" of how much time to spend for post production, I still have a bit of time left to wish you, "happy bubbles, happy shooting and all the best" :-)
Further Reading
Continue Reading Part 7 - Vivid Colors
Back to Part 6a - Retouche Basics
Featured Posts
-
Please "Like" My Photo!
Once you've made some cool underwater shots, you would love to have more people notice your photos, for example by sharing them on Facebook. A path full of potential but lots of nasty obstacles on the way. Let's have a look!
-
Reef-Art: Looking at the Reef...
Reef-Art shows fascinating insights to an underwater world, 99% of the divers never see. Reef-Art is the "Fine Art" of macro photography. It's a passion! The passion to bring your audience something they don't expect, they h...
-
Underwater Photography: Shoot...
Are you ready for huge perspectives in your underwater photographs? Wide-angles are fine but do you want it even wider? Time to check out underwater panorama photography!


Load more comments
mcliffy2 6/5/2014 3:13:24 PM Great article. One thing I'd add for Photoshop is the content-aware fill. It works well when there is a lot of of backscatter in blue or green water, and is also great for removing pesky bubbles from divers that are ruining an otherwise great shot.
Rico Besserdich 6/21/2014 9:30:15 AM Thanks for your kind comment. Yes, content-aware fill is a good tool, too. I might include it in the "advanced" series later on.
Timur K 8/8/2014 6:40:13 PM Wow. Very useful.