Published
Feb. 3,
2017
The Final Touch: Post Production of UW Images (Part 4: Essential adjustments, Colors)
Fine-tuning of our underwater images in postproduction requires taking a closer look at the colors, and while doing so, requires the ability of our photographic eye. Just sliding sliders in Photoshop or Lightroom and observing what happens rarely results in pleasant images.
The ideal starting point is to have an image in RAW or DNG format, a calibrated computer screen, proper light at your working place and an image editing software such as Adobe Photoshop or Lightroom. 95% of image editing can be done in Adobe Camera Raw (ACR); the RAW processor of Photoshop and Lightroom is based on exactly the same engine. Following my tutorials, you might have noticed that I always refer to ACR or Lightroom. Still, we are talking about postproduction, not about digital image manipulation ;-)
How you want your image to look like after editing is your choice alone. It is your photograph and you can do whatever you want with it. But let's cover some basics.
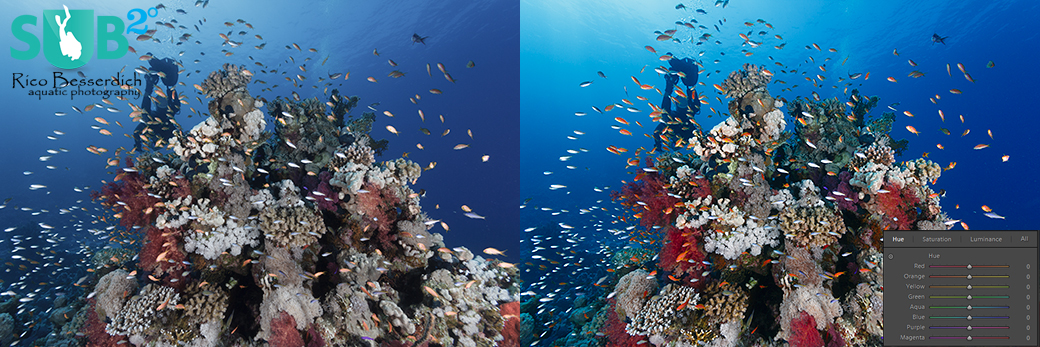
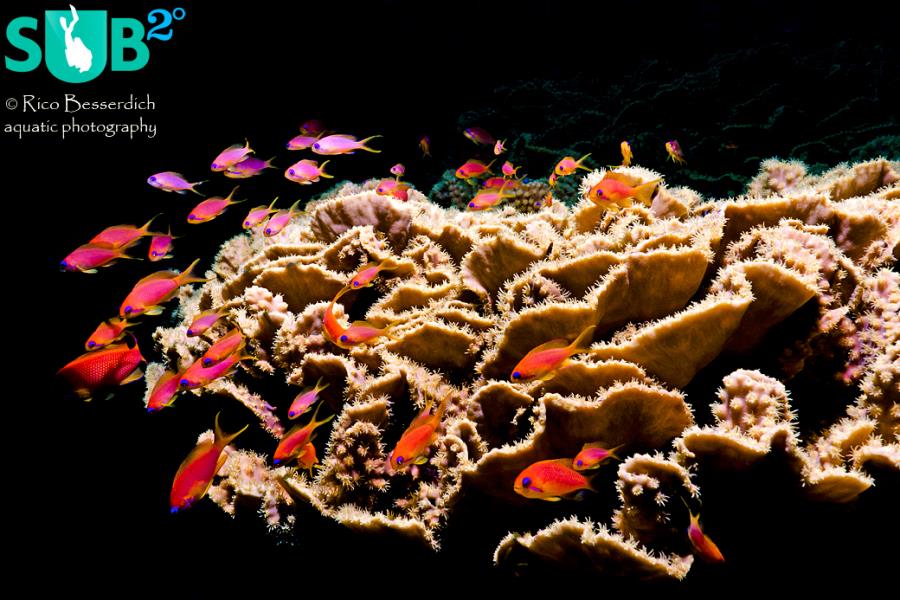
The very first step to solve color problems is always the white balance. I did that with the following picture and applied a few subtle exposure and contrast adjustments (see the inserted screenshot from ACR). The image now looks like this:

In general, the photo looks OK; there are lots of colorful subjects in it, and the histogram looks fine. But I believe that more could be done with it, referring to the colors.
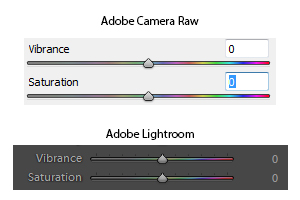
On a first view, the easiest tools seem to be the Vibrance and Saturation sliders, found in ACR and in Lightroom's development module.
However, with those two controls, a lot can go wrong, especially when over-using them.
Vibrance boosts the saturation of your lower-saturated colors. It might sound nice, but let's have a closer look.
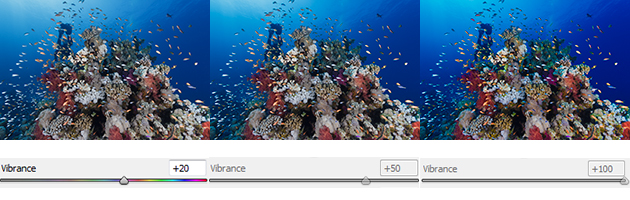
While a slight boost (+20) to the right brings slight improvements, a value of +50 results in unnatural colors, and "full-power" (+100) almost destroys the image. Let's look to the extreme version of +100 vibrance boost:
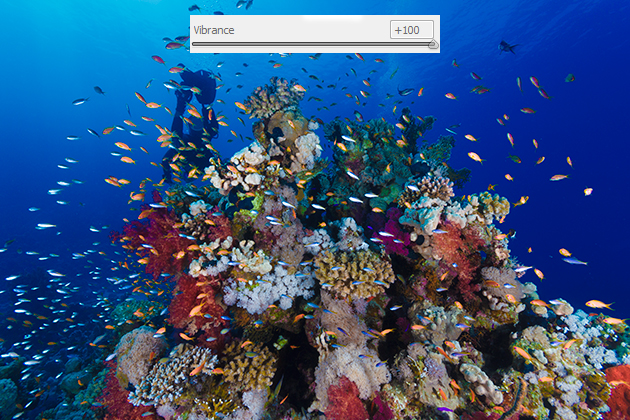
We might think "Wow, that really pops!" But actually, lots of color details are wrong.
Next is Saturation:
Saturation increases or decreases color intensity across all channels. Let's have a look:
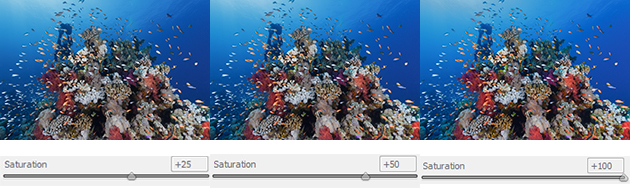
Same story here: a subtle move to the right adds a little helpful saturation to the image but when over-using it (+50 or even +100), things get nasty. Let's check the "+100" boost:
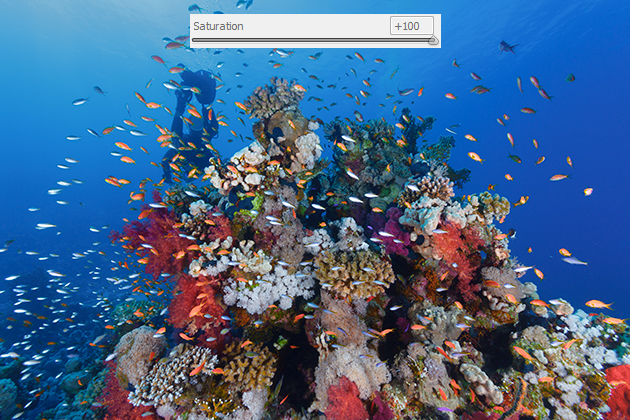
What appears as "colorful" actually consists of merciless over-saturated colors.
In conclusion, I would use the Vibrance and Saturation sliders extremely carefully or even better, not touch them at all. The thing is that we don't want to "boost" all colors in an image; we want to make subtle adjustments to specific colors that we find could use a little help in postproduction. And this means that first, we need to see and understand what to fix by carefully looking at all the colors in the photo. Second, we need a precise tool to work on those specific colors. By the way, this is the last call for having your computer screen calibrated ;-)
Let's have a closer look at the tutorial image and mark a few color areas that could use improvement.

1: The orange color of those fish is pretty poor and flat.
2: The red and purple tones of this soft coral are slightly washed out.
3: The colors of this hard coral look flat.
4: All blue-tones of the water look a little flat.
As always in proper postproduction, it is crucial to zoom in to 100% and then scroll and look around in the image to spot finest details or "problem zones".
As we are still working in the RAW processor, the most powerful tool (in ACR and Lightroom alike) to work on fine adjustments of specific colors is the HSL control tab.
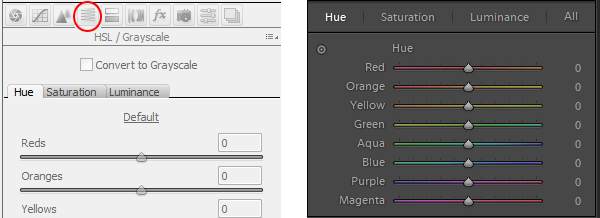
[You access the HSL tool with the 4th icon on the top-right in ACR. In Lightroom, it is in the development module, just below the tone curve control]
HSL stands for Hue, Saturation & Luminance, and the HSL tool provides the option to modify hue, saturation, and luminance of ANY color in our photo.
H (Hue): A gradation or variety of a color
S (Saturation): The degree of Chroma or purity of a color
L (Luminance): The quality or condition of radiating or reflecting light
We can now optimize/alter specific colors of the image by moving the single color sliders of the colors we want to edit. This counts for each color and for each state (Hue, Saturation, Luminance).
Back to the tutorial image, focusing mostly on orange, yellow, red, and blue tones, and altering their Hue, Saturation and Luminance values, the image now looks like this:
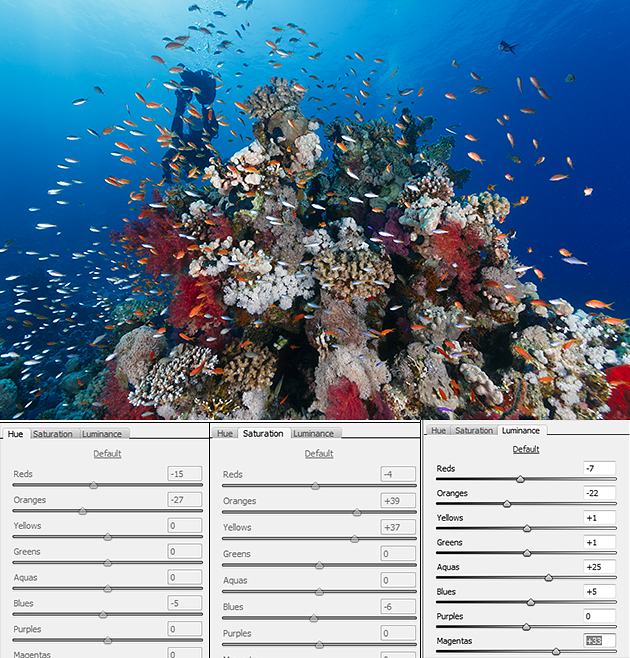
The orange-colored Anthias are now in a nice contrast-harmony with the blue water, and those soft and hard corals are looking fancier now as well :-)
Further Reading
Continue Reading Part 5 - Fixing Color Casts
Back to Part 3- Essential Adjustments: Contrasts and Curves

Featured Posts
-
Please "Like" My Photo!
Once you've made some cool underwater shots, you would love to have more people notice your photos, for example by sharing them on Facebook. A path full of potential but lots of nasty obstacles on the way. Let's have a look!
-

Reef-Art: Looking at the Reef...
Reef-Art shows fascinating insights to an underwater world, 99% of the divers never see. Reef-Art is the "Fine Art" of macro photography. It's a passion! The passion to bring your audience something they don't expect, they h...
-
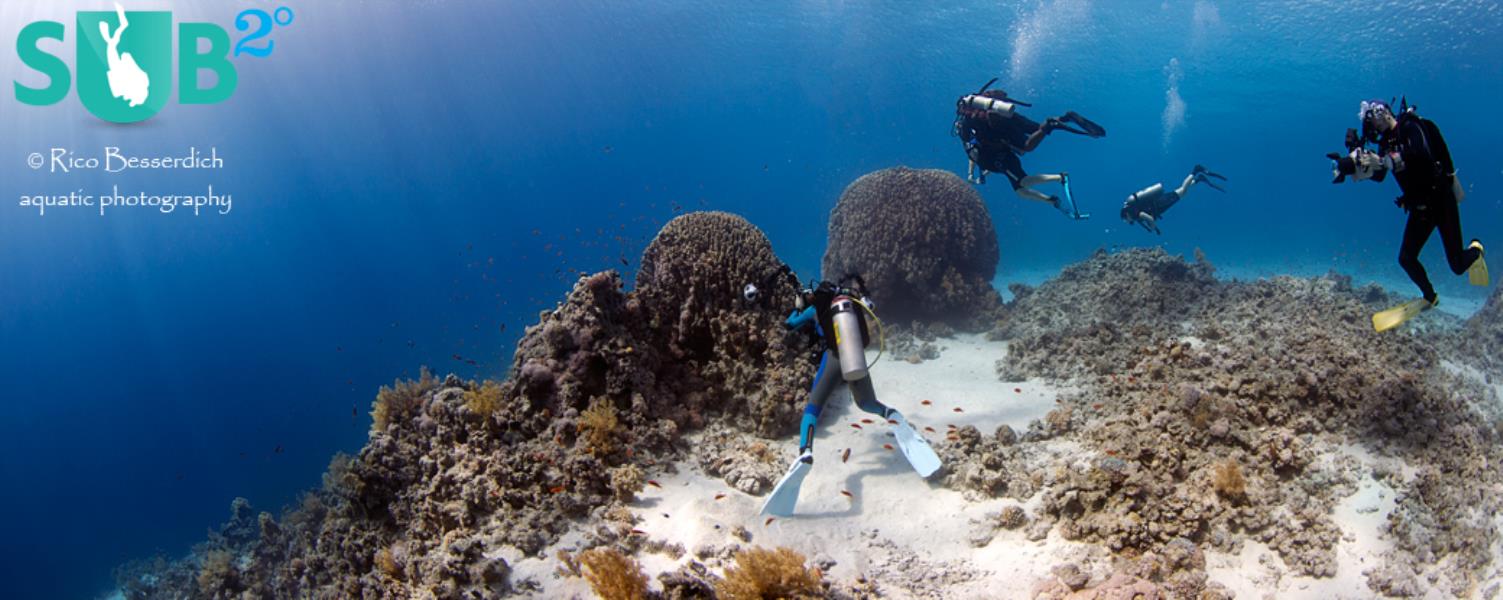
Underwater Photography: Shoot...
Are you ready for huge perspectives in your underwater photographs? Wide-angles are fine but do you want it even wider? Time to check out underwater panorama photography!
Load more comments
Frank Nelissen 5/12/2014 9:24:10 AM A new superb article in how to post process your UW shots. Splendid work! Especially I love the phrase "it's about postproduction, not about digital image manipulation" because nowadays manipulation seems to be more important then taking a decent shot...
Rico Besserdich 5/12/2014 8:25:39 PM Many thanks Frank ! Glad you like it :-)