Published
Dec. 16,
2016
The Final Touch: Post Production of UW Images (Part 2a: Exposure Basics)
As always, the best case is to realize the proper exposure of your underwater images while shooting them. But sometimes this is easier said than done, and there are shots with insufficient exposure, which we, for whatever reasons, simply want to keep and "rescue".
So, what is exposure?
In photography, exposure is the amount of light reaching your camera's digital sensor, as determined by shutter speed, lens aperture, and scene luminance.
"Correct" exposure is an exposure that achieves the effect the photographer intended.
However, cameras or editing tools such as Photoshop or Lightroom are not very interested in our intentions. They only judge the exposure by technical aspects: counting the pixels, measuring all tones, and showing the results in a histogram. This means that what a histogram might declare as "wrong" doesn't have to be so. Histograms have no knowledge of, for example, the high popularity of UW images with a main subject in front of a black background ;-)
What a histogram tells us about an image can easily turn into a science, but for this tutorial I'll keep it simple.

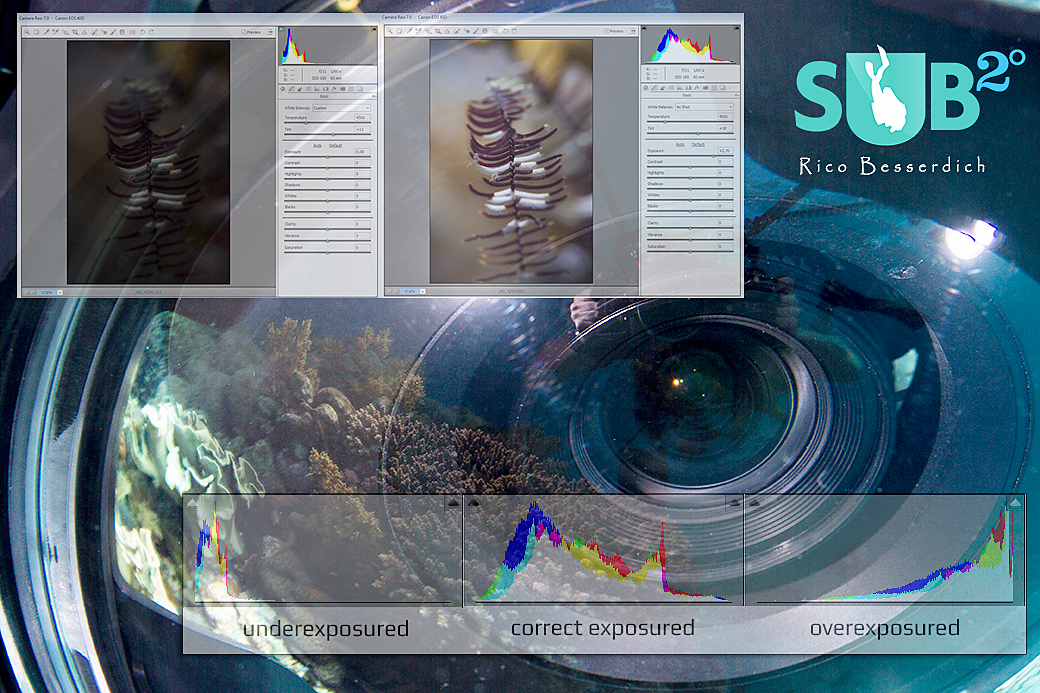
1st – Underexposured: All displayed data in the histogram is pretty much left oriented, even touching the left border. The white triangle symbol in the upper left indicates the blacked-out shadows ("clipped blacks"). Keep in mind that "too much left = too dark".
2nd – Correct exposured: We have a nice little "hill" of tonal information, which neither touches the left nor the right border of the frame. Both triangle symbols are black, which means: no clipping. Like I said, histograms show the "technical truth" and have little tolerance for photographer's intentions.
3rd – Overexposured: All displayed data is right oriented on the histogram and even touches the right border of it. The white triangle symbol in the upper right indicates burned-out whites (= "clipped whites"). Keep in mind that "too much right = too bright".
A few tips:
- Shoot RAW. Only RAW images store all information captured by your camera's sensor.
- An underexposed image might get "rescued" during digital postproduction, but there is only little to no hope at all to recover a totally overexposed image. White will stay white. You can't restore image data where no image data exists.
- Review the histogram carefully. Sometimes it might appear as totally outburned (whites or blacks) but if you see that the little "hill" is close to the right or to the left border of the histogram, but "falls down" just a tiny bit before it, then there is still image information to recover... nothing is "lost" :-)
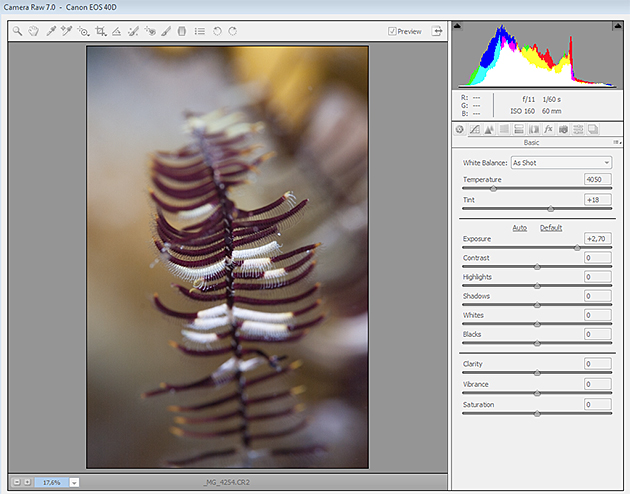
Now, let's look at a "bokeh-style" photo of a Crinoid that I made a time ago:
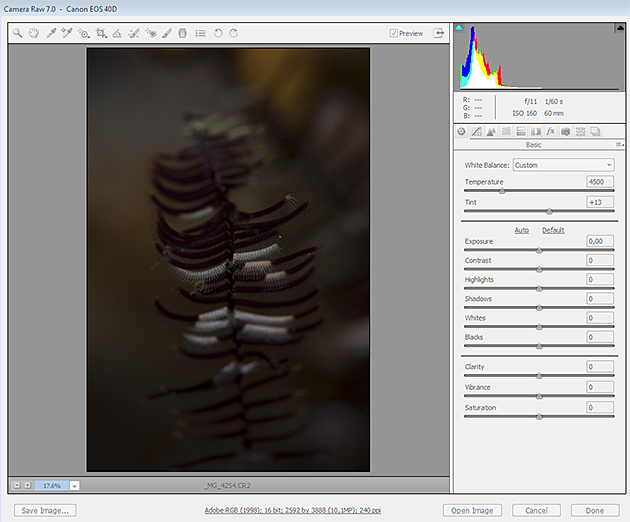
Obviously the photographer didn't do a good job here – the image is underexposed. The histogram of ACR (Adobe Camera Raw) proves it as well, showing us a clipped area on the left.
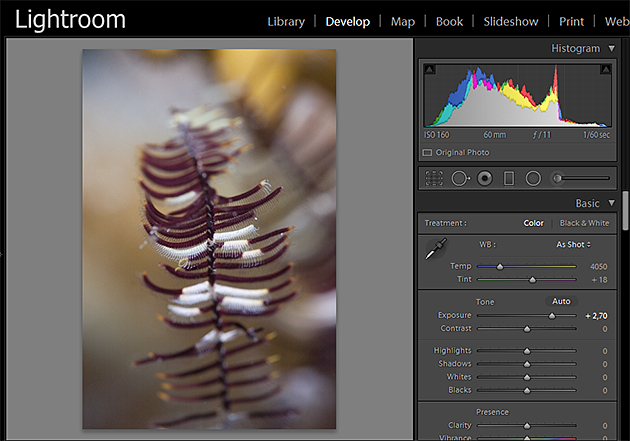
Things don't look any better in Lightroom:
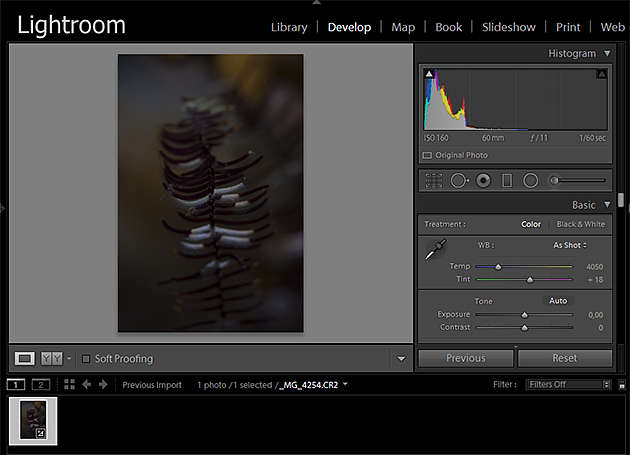
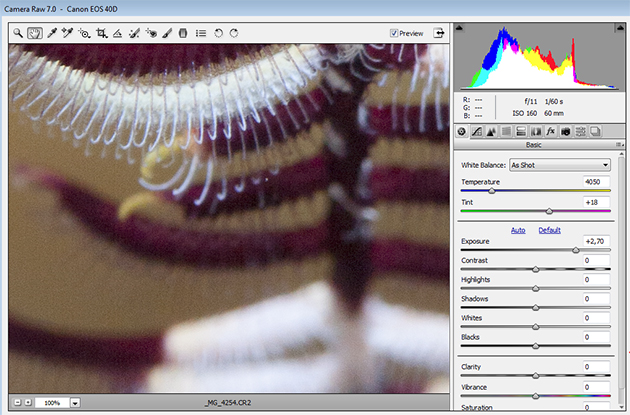
But since I can't dive in such nice places every day, I wanted to fix this image by altering the exposure. The histogram indicates it’s "too dark" but let's have a closer look:
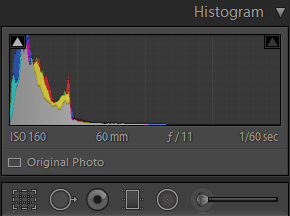
Everything is pretty much on the left, but that little hill is "falling" down again, just a tiny bit before the left border of the histogram's frame. This tells me that there aren’t totally clipped blacks and that there is hope!
Both Lightroom and Photoshop ACR have an exposure slider right below the white balance section. I now carefully move the exposure slider (gently) to the right while simultaneously watching the result – one eye on the image itself, the other one on the histogram, checking for clippings and more importantly, checking how the overall image changes.
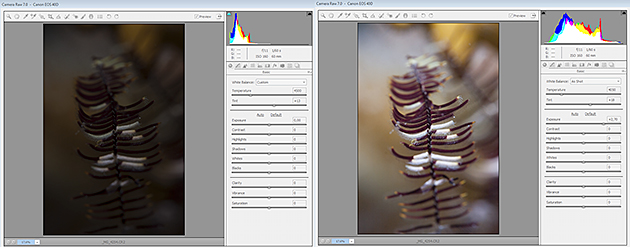
Now, the image looks like this:
The only thing I did was move the exposure slider until the exposure was nice (until +2,70 in this example). Luckily, ACR's histogram agrees with me, showing me a proper tonal range, without clipped blacks and clipped whites.
I usually don’t recommend going over "+1,50" to prevent nasty noise in dark areas. This, however, also depends on the dynamic range of your camera. The best way to check is by zooming in to 100% and taking a closer look:
Not bad. No serious digital noise in the dark areas, but of course this image would be a better one if done right while shooting it ;-)
Doing the same thing in Lightroom (moving the exposure slider up to "+2,70") brings the same result:
There are a few more adjustments to be done on this image, but just by using the exposure slider and knowing a bit about histograms, we've taken a proper step forward! There are a few more fine-tuning tips for improving the exposure of an image during digital postproduction, which I'll discuss in the next post.
Further Reading
Continue reading Part 2b - Advanced Exposure
Go back to Part 1- White Balance
All Other Articles From Rico Besserdich
Overview of Scuba Diving in Egypt

Featured Posts
-
Please "Like" My Photo!
Once you've made some cool underwater shots, you would love to have more people notice your photos, for example by sharing them on Facebook. A path full of potential but lots of nasty obstacles on the way. Let's have a look!
-

Reef-Art: Looking at the Reef...
Reef-Art shows fascinating insights to an underwater world, 99% of the divers never see. Reef-Art is the "Fine Art" of macro photography. It's a passion! The passion to bring your audience something they don't expect, they h...
-
Underwater Photography: Shoot...
Are you ready for huge perspectives in your underwater photographs? Wide-angles are fine but do you want it even wider? Time to check out underwater panorama photography!
Load more comments