-
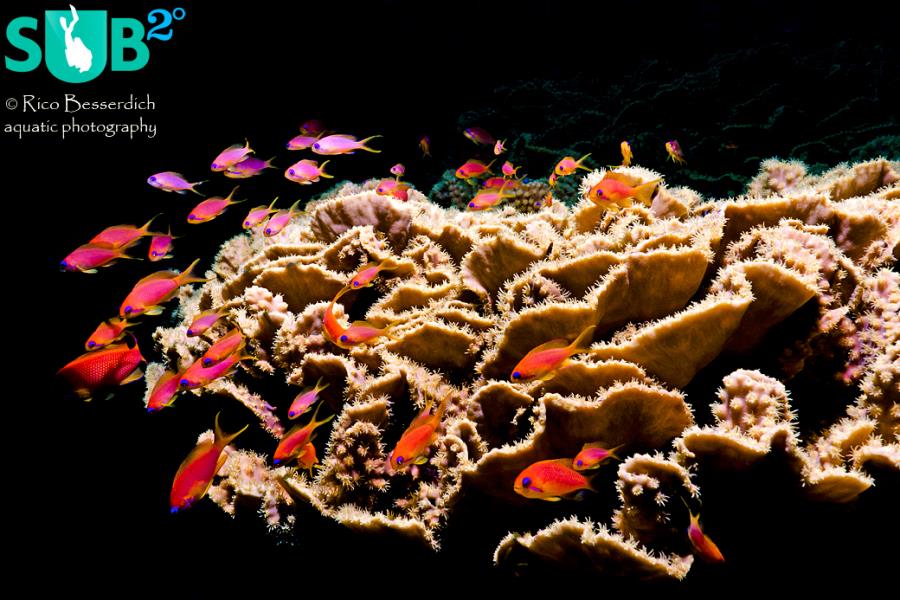
Fiddle Garden
Panorama shots with moving objects in them require shooting the images series quickly. It's better to start practicing with non moving subjects ;-) -
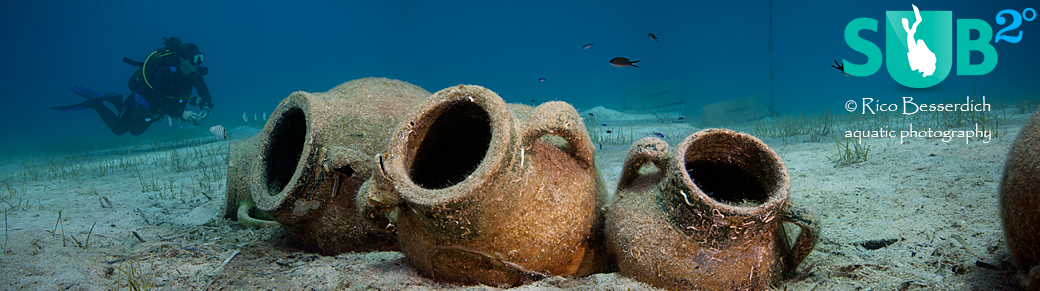
Turkish Amphorae
If it is safe for the marine environment and for yourself, kneeling on the ground is another option of gaining a stable position while shooting panoramas. -

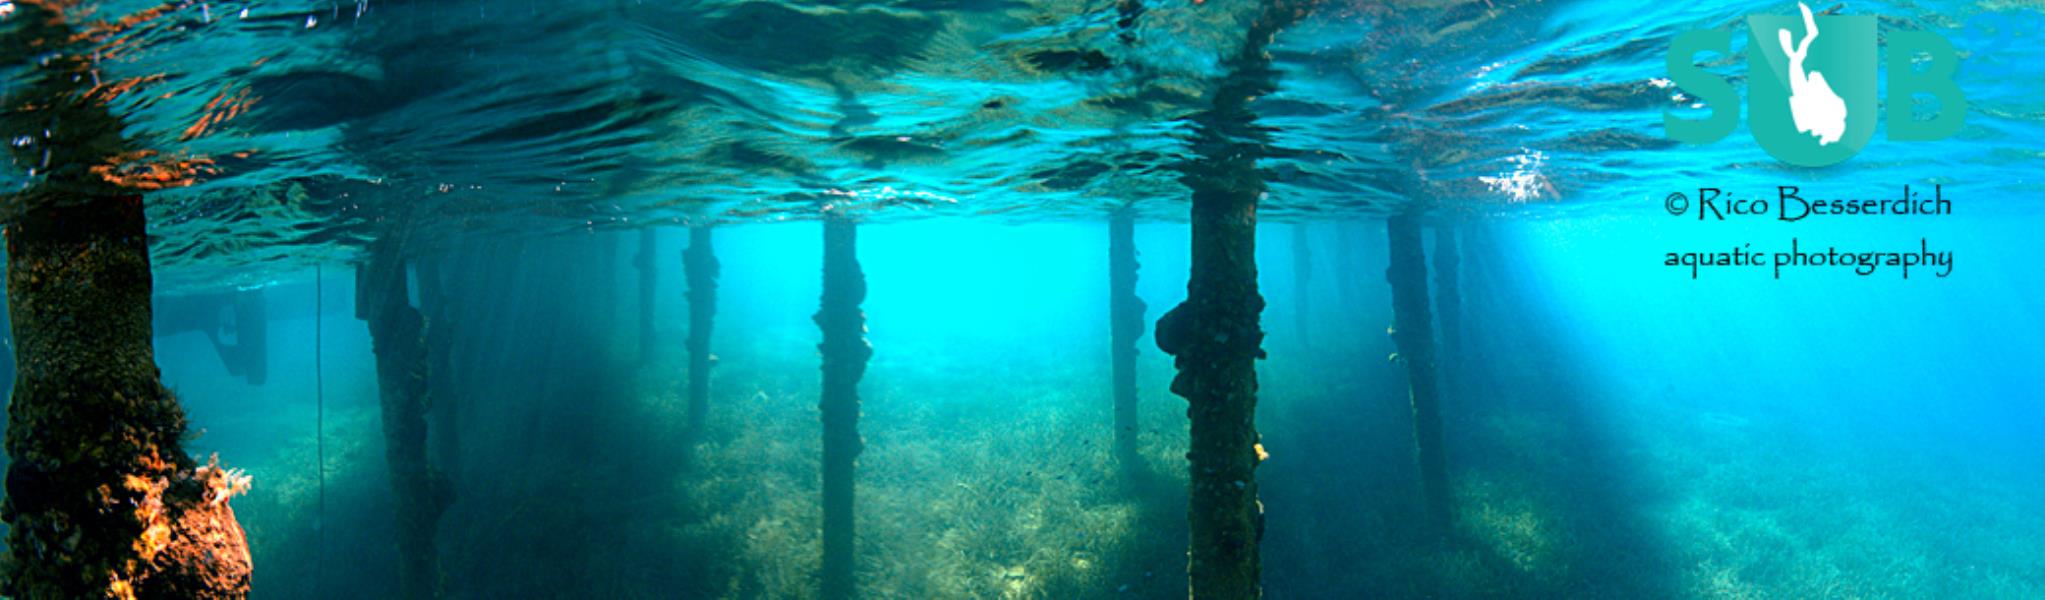
Under The Bridge
Shooting panoramas in very shallow waters allows us to use ambient light only. -

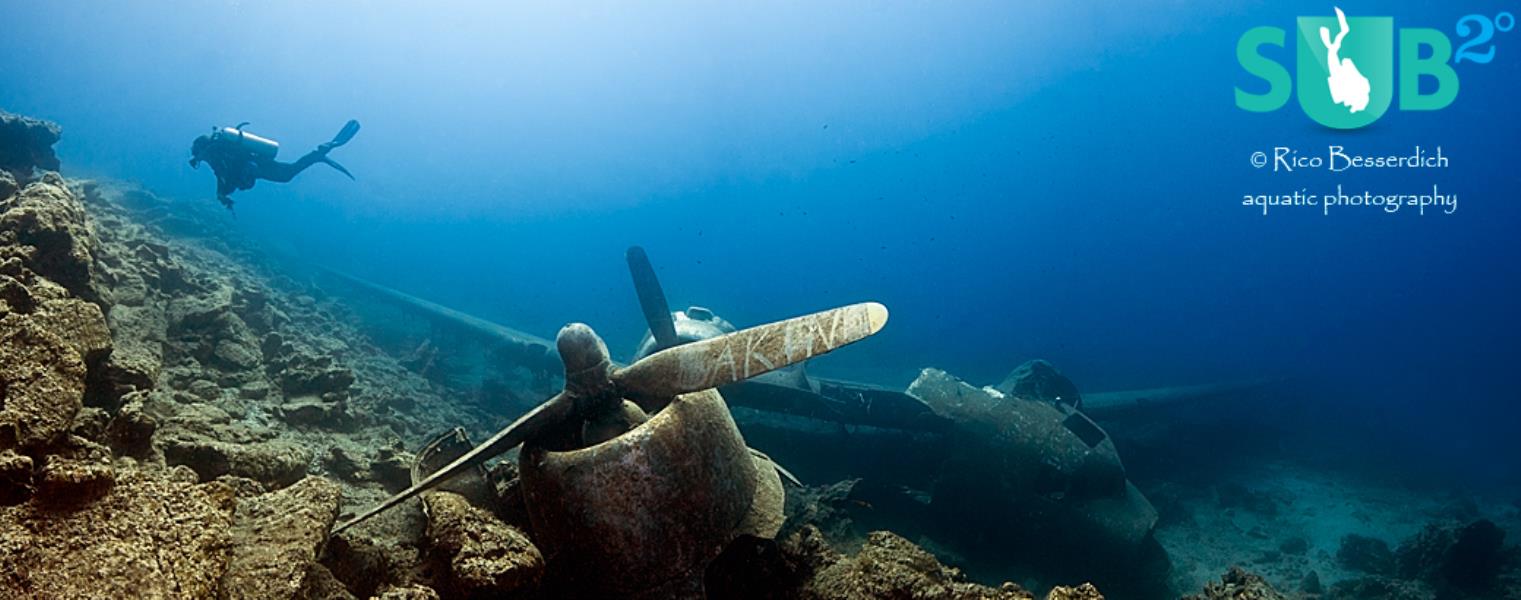
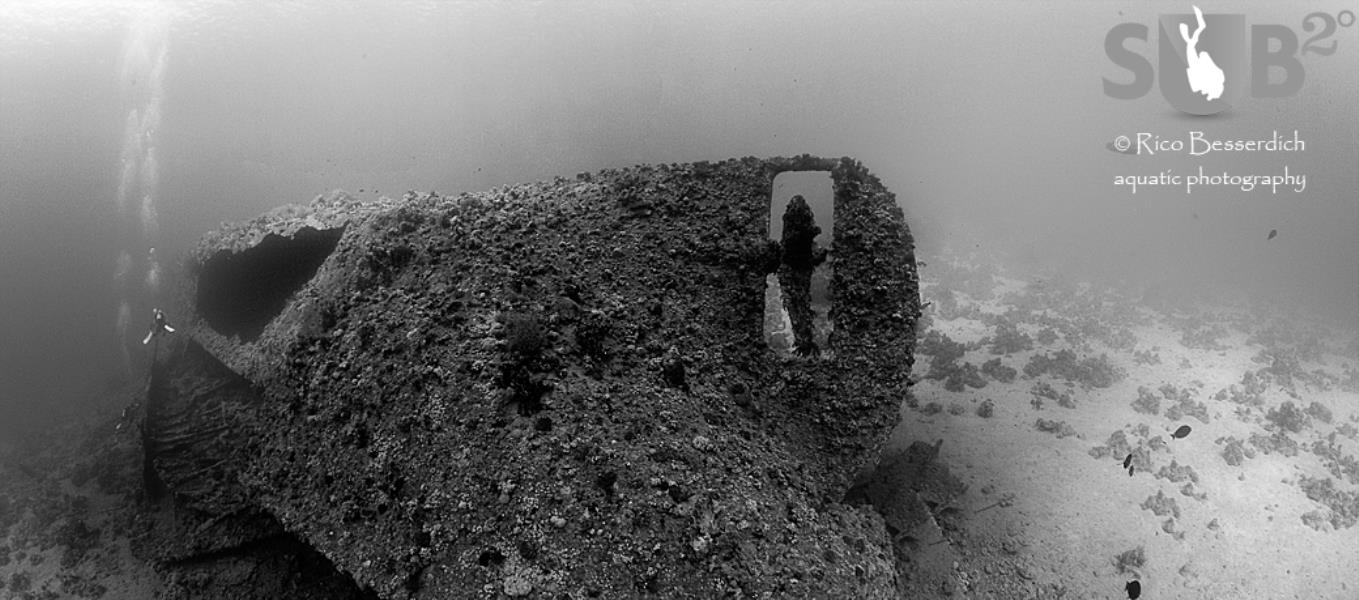
The Dunraven
This shipwreck is more than 80 meters long. This panorama consists of 4 images. -

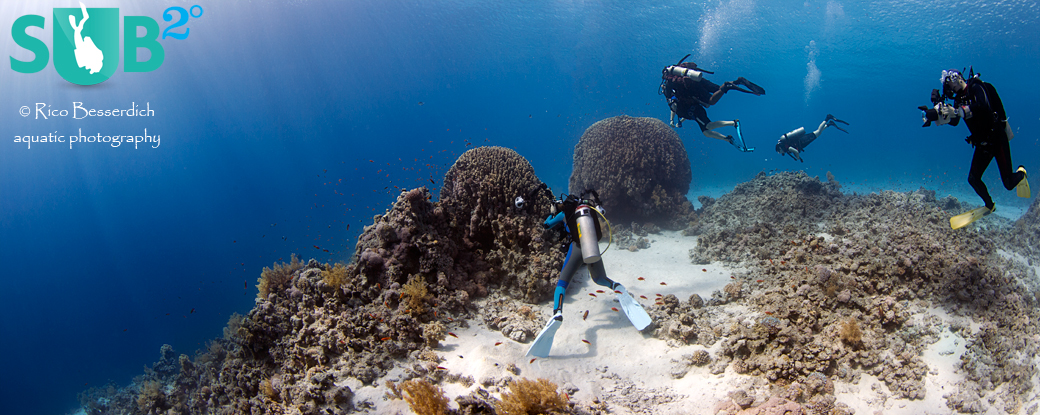
Sunken Airplane
Divers in panoramic images give the beholders an idea of the dimensions underwater.
Underwater Photography: Shooting Panoramas
A panorama – stemmed from the Greek ‘pan’ meaning ‘all’, and ‘horama’ meaning ‘sight’ - is any wide-angle view or representation of a physical space, whether in painting, drawing, photography, or film/video. The early 19th century was the peak time of panoramas, when paintings of 100x15 meters fascinated the beholders.
In landscape and architectural photography, panoramas are used very frequently, showing scenes that no lens in the world could capture with one single image, at least not in proper quality.
Why is that so? The horizontal angle of the human eye is 176 degrees, a 50mm camera lens has around 45 degrees, and a 10mm super wide-angle lens provides 122 degrees.

Now, imagine standing in front of the Buckingham Palace, a huge building. What would you need to do to see it entirely? You would need to increase the distance between the building and yourself. But this option doesn’t really exist in underwater photography, as distance from the object results in loss of contrast and colors in the photograph (remember, get closer!).
So, a panorama might be an option. Photographic panoramas consist of a series of several photos shot in the same place, at the same time, and from the same shooting position. At the end, the images of the series are stitched together using imaging software. If everything works well, we then have a really wide scene (even up to 360 degrees) in one image.
Note: Panorama photography on a high-end level is complex, and requires special equipment such as tripods and so-called nodal point adapters. To keep things simple, I would like to introduce you to my so-called “free-style” technique that works without any special equipment. P.S. All images above are taken using this technique.
You need:
- A camera, preferably equipped with a wide-lens or wide-angle adapter.
- A nice “wide” subject to shoot (wrecks, underwater landscapes etc.) For beginners, I recommend working on static, motionless subjects.
- A good underwater visibility. At least 15 meters, but 20 or more is better.
- Excellent diving and buoyancy skills. Half of this technique depends on your diving skills.
How to do it:
- First, find yourself a nice subject. UW landscapes, reefs, and wrecks have great panorama potential. It helps a lot to stay in shallow water, 5-15 meter, as this depth gives you the opportunity to work with ambient light instead of flashguns.
- If possible, switch to manual focus. If this option does not exist, set the auto focus to center spot only.
- Adjust your camera settings by measuring the scene/object you plan to shoot. Set your shutter, aperture, and ISO. Take a test-shot and refer to the histogram in your camera's LCD display.
- Now stabilize your own position. Check your buoyancy, as it is important that you exactly stay at the same position. If you have the opportunity (without damaging nature or hurting yourself) to kneel on the ground; that works as well. Imagine a monopod (a tripod with only one leg). You are this monopod now. Get in an upright position (like standing in the water) and look through your camera's viewfinder.
- Stay in position, don't change your depth and turn a bit to the left around your own (mono-pod!) vertical axis while looking through your camera's viewfinder. A very slight “mini-kick” with your right fin would do it.
- Check your subject, and if you are happy with the frame, take the first shot.
- Keep your eye on the viewfinder and turn a bit to the right. You will see in your viewfinder that now a new frame of the wreck, for example, is ready. Try to keep an overlap between single images of around 30% - meaning the right border of image number 1 should not be on the left border of image number 2. They should overlap a bit, as this is important for image stitching later.
- Take your next shot. Remember, stay in position. You are ‘standing’ in the water and you turn only around your own vertical axis, not swimming to the right or to the left, and definitely not changing your depth. As said, this technique is half a diving skill ;-) It's also a good idea to do a couple of panorama image series of one and the same subject, as using this "free style" technique does not always produce a perfect result on the first attempt.
- Happy with the frame? Do the next shot then.
- Turn once more a bit to the right (keep that overlapping in mind) and shoot the 3rd photo of the scene.
- Listen to the applause of the crowd, as you've just shot your first underwater panorama series! It's up to you to shoot a series of four or more photos, of course.
Hint: Later, when reviewing the photos and selecting those to stitch together to a panorama, you might get slightly confused as to which image belongs to the panorama series and which one doesn’t. Here’s an easy way to remember: Shoot your own hand before and after each series. The pictures ‘between the hands’ belong to the panorama :-)
Photoshop, Lightroom, and many specialized tools such as Panorama Studio PRO have assistant-guided functions to help you stitch the photos to a panorama image. How to use that sort of software for panorama shots will follow in a separate blog post here on The Sub2o :-).
Happy (panorama) shootings, happy bubbles, and always stay safe!
Further Reading
All Other Articles By Rico Besserdich

Featured Posts
-
Please "Like" My Photo!
Once you've made some cool underwater shots, you would love to have more people notice your photos, for example by sharing them on Facebook. A path full of potential but lots of nasty obstacles on the way. Let's have a look!
-

Reef-Art: Looking at the Reef...
Reef-Art shows fascinating insights to an underwater world, 99% of the divers never see. Reef-Art is the "Fine Art" of macro photography. It's a passion! The passion to bring your audience something they don't expect, they h...
-
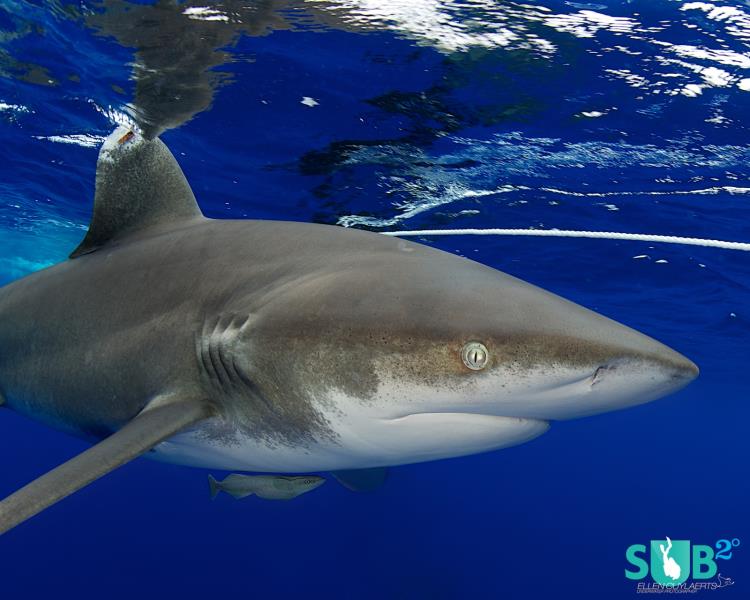
5 Basics of Shark Diving
Before going on a shark adventure, there are some things you need to know to make it a great experience for you and the sharks!
Load more comments
Rico Besserdich 10/14/2013 9:15:24 AM Many thanks Frank ! Glad you like it :-)
Ocean Watson 3/4/2016 10:06:05 PM Those are some awesome looking photos. Really good!
Rico Besserdich 3/8/2016 5:22:53 PM Ocean Watson, Thank you! Glad you like them :-)