
Published
Jan. 6,
2017
The Final Touch: Post Production of UW Images (Part 2b: Advanced Exposure)
After adjusting the white balance and basic exposure correction in Adobe Photoshop's Camera RAW or Lightroom (remember: the RAW processors of PS & LR are similar, only their user interfaces are different), it’s time to take a closer look at some fine exposure corrections.
Please bear in mind that a "correct" exposure is an exposure that achieves the effect the photographer intended. This means that an image that is marked by Adobe Camera Raw (ACR) or Lightroom's histogram as “wrong” can be still a good shot if you intend to work with under or overexposure as creative elements. Take low-key or high-key photography as examples here, but for our first steps we'll try to achieve "technical correct" exposures by using the histogram as a reference.
This tutorial refers to the ACR 7 processing engine (2012) that serves in Photoshop CS 6 and Lightroom 4 & 5.
Again, always try to shoot your images in RAW (or DNG). When shooting only JPG, the post production is already done by your camera and the resulting JPG image is already compressed and has way less information (brightness levels, colors, tonal information etc.) than a RAW image. Simple rule: the more information stored in an image (RAW format is the optimum here), the more can be done with it during digital postproduction, which we don't mistake with digital manipulation- they are two completely different things.
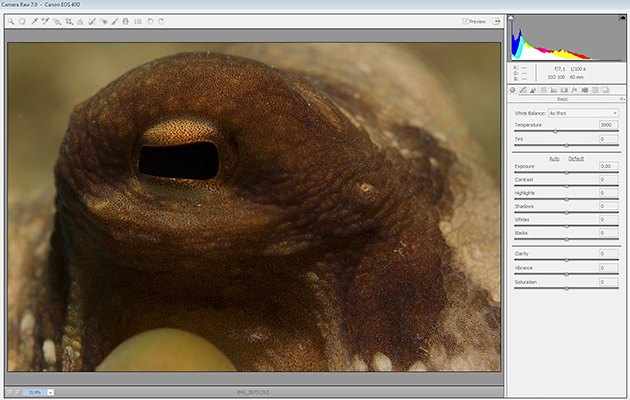
Now, let's go and see how to do a few more fine-tunes with the overall image exposure! For this, I've dug deeply in my archives and found a close-up shot of an octopus from my very first dive with a D-SLR.
Straight from the camera and with no alterations done, the image looks like this:
First of all, think about whether this shot is worthy of editing or not. As for this octopus shot (and not to become sentimental here) I believe it has potential. Good news is, it takes only 5 minutes to get this image right.
So, following my own tutorials here on white balance and basic exposure adjustments, the image now looks like this:
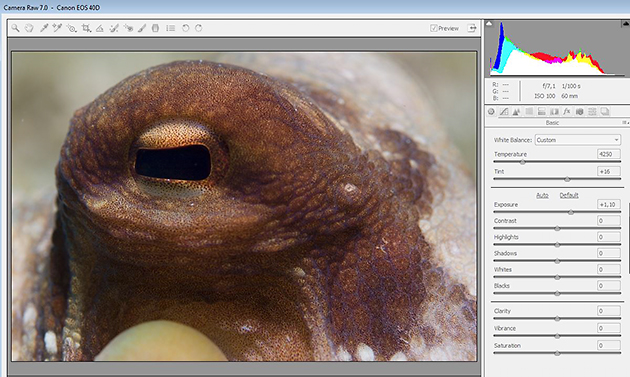
‘Quite cool’ you might say, but as we are photographers, it is our gift- or curse- to look at images in different and analytic ways. I like the image too, but I believe a few more fine exposure adjustments could be done, striving for a better result.
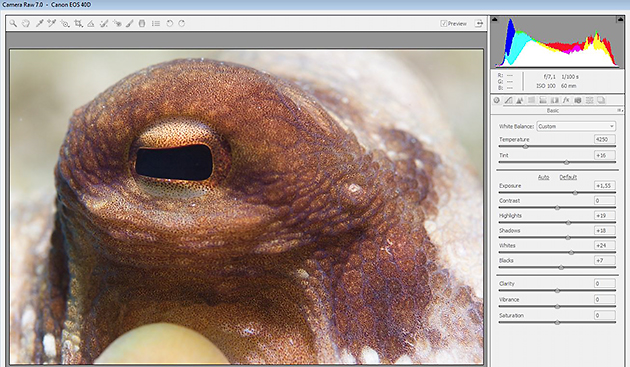
So, by looking again and very closely at the image, I spot a few things that I want to fix. Let's have a look together:
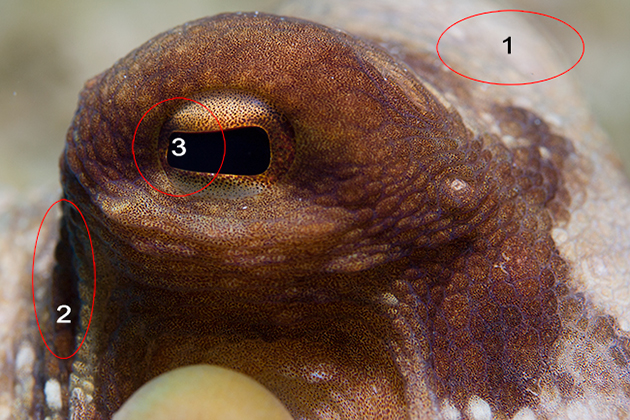
1: It's somehow 'greyish' and looks sort of 'dirty'. This area could use a slight exposure boost.
2: It's not ‘clipped’ but pretty close to it. I would like to see some more details in the shadows.
3: I think that a fine adjustment of exposure for the eye could ‘punch’ it a bit more.
Once again, it’s important is to train your photographer’s eye, looking at the finest details and, if necessary, making fine adjustments. Less is often better, and the better your 'source material' (the photograph), the better your final images after postproduction will be.
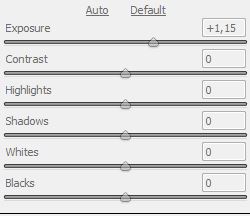
In Adobe ACR and in Lightroom alike, there are a couple of sliders on the right that allow us to make fine adjustments. I'll skip the ‘contrast’ slider for now, as this will be part of an extra tutorial. So, let's go for ‘highlights’, ‘shadows’, ‘whites’, and ‘blacks’.
The Highlights slider brings back or darkens the highlight detail. It’s very useful for you to recover lost details in slightly ‘overexposured’ areas, and it can also add a little pleasing glow to the overall image.
As for my example image, I found that a little glow would be just the right thing, and so I moved the Highlights slider to ‘+19’. This gave the image a slight punch and half solved the critical (greyish) area ‘1’.
With the Shadows slider, you can brighten up a lot of information in the shadows. Very dark shadows are not ideal. I was not so pleased with the few very dark shadows in the image (area 2 & 3), so I brightened the shadows up a bit by moving the Shadows slider to '+18'.
The Whites and Blacks sliders fine-tune the furthest extremes of your photograph’s range by providing the opportunity to alter black-and-white points of an image. My intention is to give that octopus a bit more glow. I moved the White Slider to '+24' - now problem zone 1 looks OK- and moved the Black slider to '+7', slightly lightening up the darker areas. As the last step, I moved the exposure slider a bit more to the right (from +1.15 to +1.55), just following my own idea on how I want that photograph to look like.
Please bear in mind that you'll need to watch the change of finest details in your image AND the changes in the histogram very closely and carefully while working with those sliders.
After the white balance, basic exposure adjustment, and fine exposure corrections, here is the result (and the histogram looks good too).
Continue Reading Part 3- Contrast and Curves
Go back to Part 2a- Exposure Basics
All Other Articles from Rico Besserdich
4 of the Best Sights in Istanbul
Now that's a huge aircraft! Diving the Dakota DC3 in southern Turkey

Featured Posts
-
Please "Like" My Photo!
Once you've made some cool underwater shots, you would love to have more people notice your photos, for example by sharing them on Facebook. A path full of potential but lots of nasty obstacles on the way. Let's have a look!
-

Reef-Art: Looking at the Reef...
Reef-Art shows fascinating insights to an underwater world, 99% of the divers never see. Reef-Art is the "Fine Art" of macro photography. It's a passion! The passion to bring your audience something they don't expect, they h...
-
Underwater Photography: Shoot...
Are you ready for huge perspectives in your underwater photographs? Wide-angles are fine but do you want it even wider? Time to check out underwater panorama photography!
Load more comments
Frank Nelissen 4/30/2014 9:33:12 AM Another clear, easy to understand, well explained and good documented article! The way it should be!
Rico Besserdich 4/30/2014 11:45:24 AM Frank Nelissen, thank you ! Glad you like it. Still it is all very essential but way more advanced techniques might follow in a new series :-)